Exhibit A: one 1970s coffee table, solid wood, heavy as all get-out, and definitely ready for a makeover.
The finish is in pretty awful shape, which makes it even easier to strip off. I read about all sorts of methods of doing this on blogs ... most of which are messy, time-consuming, and produce less-than-stellar results. Believe me when I tell you that there is a MUCH better way.
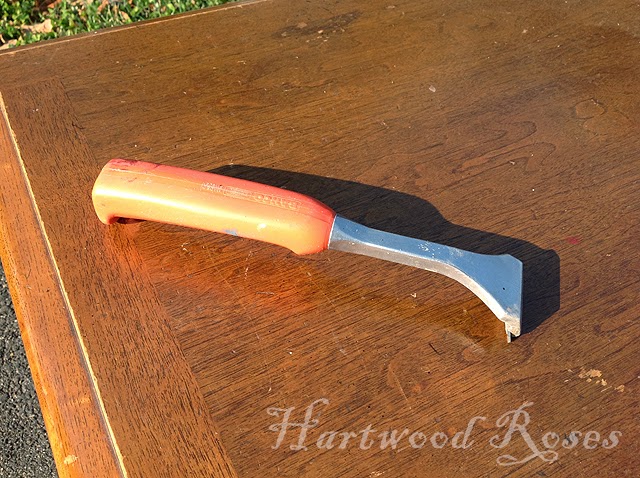
For a table top like this, I pull out my trusty Bahco carbide pull scraper with a 2-inch blade. I have tried other brands, and this one is my favorite. The blades for this thing are sort of expensive ($10 or so apiece), but they are sharp as a kitchen knife and they last for a long, long time. This tool makes the job go easier and faster ... think about it in terms of how much your time worth ... if it takes less time and produces better results, I'm all for it.
The idea is to scrape off as much of the lacquer as possible, using a pulling motion with the scraper. If you simply try to sand the stuff off with an orbital sander, the lacquer melts and makes hard globs on your sanding disk ... and you get those little spiral marks on the wood. It requires some practice and finesse to get the hang of scraping, but it's also a great way to work on those problem areas that some of us have on our upper arms ... just sayin'.
Let's start the clock and see how fast this project goes:
10:25 am -- just getting started.
11:15am -- all the finish is scraped off.
11:30am -- all finished. Sanded with my orbital sander, 150 and 220 grit sandpaper.
Here is a close-up, all stripped and sanded and ready for stain.
The paint finish I'm planning looks best with a dark top, so I pulled out my trusty can of Rustoleum stain in 'Kona'. This is what the top looked like after an application of stain pre-conditioner and one coat of stain.
Now that all the messy stuff is finished, I can work on the rest of the job inside in my workshop. Still to come, varnish on the top and a 4-step paint finish on the base of the table. Here is a preview, as seen in this grainy, low light iPad photo of one of the end tables that I finished as a test piece.
Here's a little word about my scraper ... I have had this scraper for about a million years. I bought it at a specialty paint shop in downtown Fredericksburg, which went out of business last year (undoubtedly a victim of the onslaught of big-box stores). This isn't the kind of thing that you'll find at Lowes or Home Depot. They have their own brands of carbide scrapers, made in China, of course, and I haven't been as happy with their versions as I am with my little orange-handled Bahco. (which is made in Sweden)
My new source for replacement blades is The Paint Shop in Warrenton. Small business shopping at its finest ... support your local businesses so they can continue to carry the fine-quality items that mainstream retailers don't bother with. The Paint Shop has other specialty tools, as well as Farrow and Ball paint, and all sorts of other wonderful temptations. (not a sponsored post ... just ramblings of a very, very satisfied customer.)
I think today is a good day to get started on the paint. More about this later, I promise.


